Hydroponic Seedling Tray – Complete Accessories & Setup Guide
This video shows the full process of starting seedlings in a hydroponic tray system — from preparing the materials to growing strong, healthy plants ready for transplanting. Perfect for beginners and experienced growers alike.
What’s Included:
Seeds, rockwool cubes, sponge blocks, seedling tray, watering can, and spray bottle.
How to Set Up:
Step-by-step instructions guide you through seeding into sponge and rockwool, watering, and maintaining moisture for successful germination.
Tips for Seedling Growth:
● Keep the tray covered with a top lid to maintain humidity and temperature.
● Add grow lights if necessary for better germination and stronger seedlings.
● Use the spray bottle for gentle watering and the watering can for deeper hydration once roots develop.
● Once seedlings reach 2–3 true leaves and roots are well-developed, they are ready to be transplanted into hydroponic channels or vertical towers for the main production stage.
Technical Details:
● Tray Size: Standard seedling tray footprint, compatible with most hydroponic systems.
● Suitable Crops: Lettuce, cabbage, and other leafy greens (works with a wide variety of seeds).
● Growing Time: 10–15 days on average before transplanting into hydroponic systems.
Key Benefits:
● Ensures uniform germination and strong root development
● Provides a clean, soil-free start for plants
● Saves time and reduces transplant shock for hydroponic farming
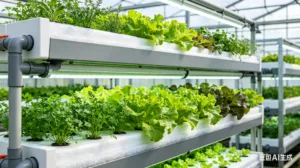
● Compatible with later stages of hydroponic growing (NFT channels and towers, etc.)
Watch this video to learn how easy it is to start seedlings successfully and lay the foundation for productive hydroponic cultivation!